I feel like having a beach theme today, perhaps because I like going to the beach so much, or because I recently made a beach-themed bottle pendant. Besides that, I like visiting the beach. It always amazes me just how BIG it is. You look out and the ocean is all you can see.
Meanwhile, the ocean is host to a whole other world! All of the different creatures living there, both teeny tiny and huge. Somehow they all survive.
When I was at the beach last (over Easter weekend) I made sure to pick up some sand and searched out some itty bitty shells that would fit into one of my bottles. Not an easy task! I also managed to find a couple of sea-urchin spines and pieces of sand dollar. They all make for a great bottle pendant:
In keeping with the beach theme of today's post, I did a search on ArtFire for the word "beach" and browsed until I found something that really caught my attention. In doing so, I came across Apple Blossom Designs 'Life's a Beach' charm.
This charm is really cute! I love the incorporation of the whole shell beads with teal crystals. It helps that one of my favorite types of shell is the spiral. I also really like the simplicity of the design, since many of the beach items I came across felt too cluttered.
Wednesday, April 22, 2009
Wednesday, April 15, 2009
Progress
As you probably noticed, I have taken the time to redesign my blog a bit. I liked the basic layout, but it needed to be more ME. I extended the content section. This may make some users have to scroll a little to see everything (not very much--I didn't extend it THAT far), but this allows for more room so that my pictures aren't constantly being cut-off. I also made the theme more green and put up a nice background picture with one of the symbols I use around my store.
Please let me know what you think.
Craftiness
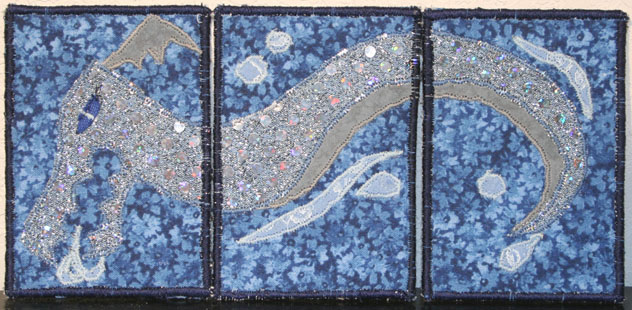
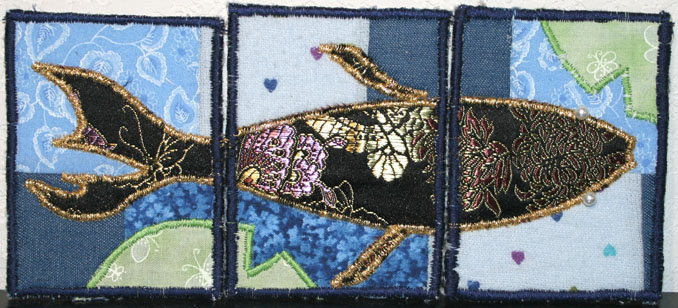
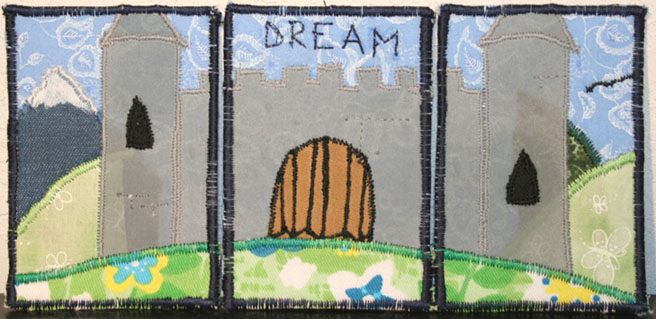
I have received all of the Fabric ATCs from the swap I was involved in, so I figured this would be a good time to show off the ones that I made for my partners. Though the swap only required me to send one to each partner, I got a little over-zealous and made a set of 3 ATCs for each partner.
"Water Dragon"
"Kimono Koi"
"Castle of Dreams"
Participating in this swap was a great experience, and on top of that it got me hooked on making these little ATCs. I already have a new set in progress for no apparent reason.
I've also been working on some new bottles. One has been in progress for a good month now, and another is nearly finished; I just need to do the wire-wrapping and 'bead' dangle I have planned for it. I'll give you one hint as to what its theme is: SeaWeed.
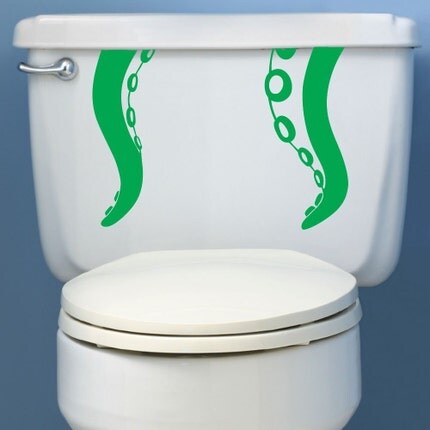
Today's feature is an interesting store on Etsy called Flush, please. Such a neat and funny idea, the store owners create decals for your toilet bowl! Imagine your guest's surprise when they walk into your bathroom to see that you are "steeping" some tea in your toilet bowl. Or perhaps you should add a sign to the bathroom door to "Beware" of your pet tentacle monster you keep in the toilet bowl.
These decals are even removable! So when you're tired of the old design and want to get rid of it, or update it to a new design, you can easily take it off and apply a new one!
The designs offered are simplistic but well done. You can also customize the color of your design. Perhaps you want your tentacle monster to be related to the devil, so RED tentacles would fit better. Not a problem!
These items are so unique and interesting, go take a look and perhaps spice up your dull bathroom a bit with these great toilet-bowl decals.
Sunday, April 12, 2009
Mustard seed bottles and changes
New Bottles
I have finally finished with the Fabric ATC swap I was a part of on Craftster.org. Now I'm just waiting to receive from my last partner. I'll post on another day with the ATCs that I sent and received from my talented partners. They've all been amazing!
Since I've had some free crafting time again (after my swaps and making Kippot for Passover), I've started work back on my bottles. I have several in progress still, but I managed to finish some of them yesterday.
Thus, I introduce some new scripture bottles.
Each of these three bottles have verses that mention the mustard seed, which Jesus uses in a few of his parables. Naturally, I have added some real mustard seeds inside the bottle to go along with the scroll verse!
There are three different mustard seed bottles, with the following verses: Luke 17:6, Matthew 17:20, and Matthew 13:31-32. I have to admit Matthew 13 is my personal favorite.
To see more of these bottles or to purchase, head on over to my ArtFire store: Oddments and Tweaks
Changes
You also might notice some changes to my blog. I'm currently working on a redesign, so please be patient with me until I get things settled down and to my liking.
Another Note
My sister is currently in the hospital dealing with some issues. If you're so inclined, she could certainly use any prayers you send her way.
Featured
Today's feature is the Etsy store uncorked. I could not find the artists name anywhere other than "a mad scientist mom." Despite that, she makes interesting and unique products. I especially like the cork necklace charms, which each come in it's own little test tube. She has some preset pictures and messages, as well as the opportunity to have your own custom photo and name or message on a cork.
So if you're looking for a unique set of jewelry that's also good for the environment, uncorked is a great place to go. If anything, take a browse through her store just to see all of the interesting images she has somehow put on these corks.
Thursday, April 9, 2009
Making Kippahs (Yamakas) for Passover
Getting ready for Passover this year, my mother-in-law asked me to make some Kippahs (Yamakas) for some friends we invited. Thus began an interesting journey. First, I downloaded a pattern online--which didn't work at all. So then I started experimenting on my own based off of one Kippah I already had.
My first experiment turned out like a pyramid--not good at all. The second just... turned out weird. My third try on my own and I had it.
So first, I'll show off my failures:
Anyway, now it's after our Passover dinner, I'm sitting sipping wine, and I decided I would post a tutorial for others to make their own Kippah. I should also mention that this is my first tutorial I've ever posted.
First, you'll need the pattern. This is what I made/used. I tried to make the picture as to-size as possible, but included measurements anyway.
You will need to cut out 4 of these. I made my pattern a little off on one side, so it's best if you cut 2, then flip the pattern to cut the other 2. Be sure to cut them all on the same side of the fabric.
Now, depending on the type of fabric you are using, there is usually a right side and a wrong side.
Here in my picture, you can see I've colored the right side green, and the wrong side is still white. You'll want to take two of your pieces and put the right sides together. (I also suggest that you put the smaller sides together, as I mentioned earlier--my pattern is off a bit)
Sew up one side of it (the smaller side).
Now you can see we have a triangle piece two pieces thick with the right sides inside. You need to do the same thing with the other two pieces you have, again only sewing up one side.
Now, take both of your pieces and unfold them, and put the right sides together points upward. Next, sew across the side that used to be pointed. This is an odd part because you can't actually follow the edge of the fabric. Essentially, you want to sew the shape you want the kippah to be. Here's a picture after sewing so you can see what it looks like:
I like to start in the middle, sew to one end, then go back to the middle and sew to the other end. You can make it all one like if you'd like; whatever you're more comfortable with.
Tada! Now you have your very own Kippah!
Here's the inside of one of mine:
Now you can finish them in any way you'd like. One good thing to do would be a close zig-zag stitch over the seams to flatten them, and perhaps around the outside edge as well. If you'd like, you can make a second one and use it to line the first, so you have a nicely lined kippah.
I hope that I have explained clearly enough, and that this will be useful for someone!
Subscribe to:
Posts (Atom)